Validation dashboard
Navigate to Validation from the sidebar.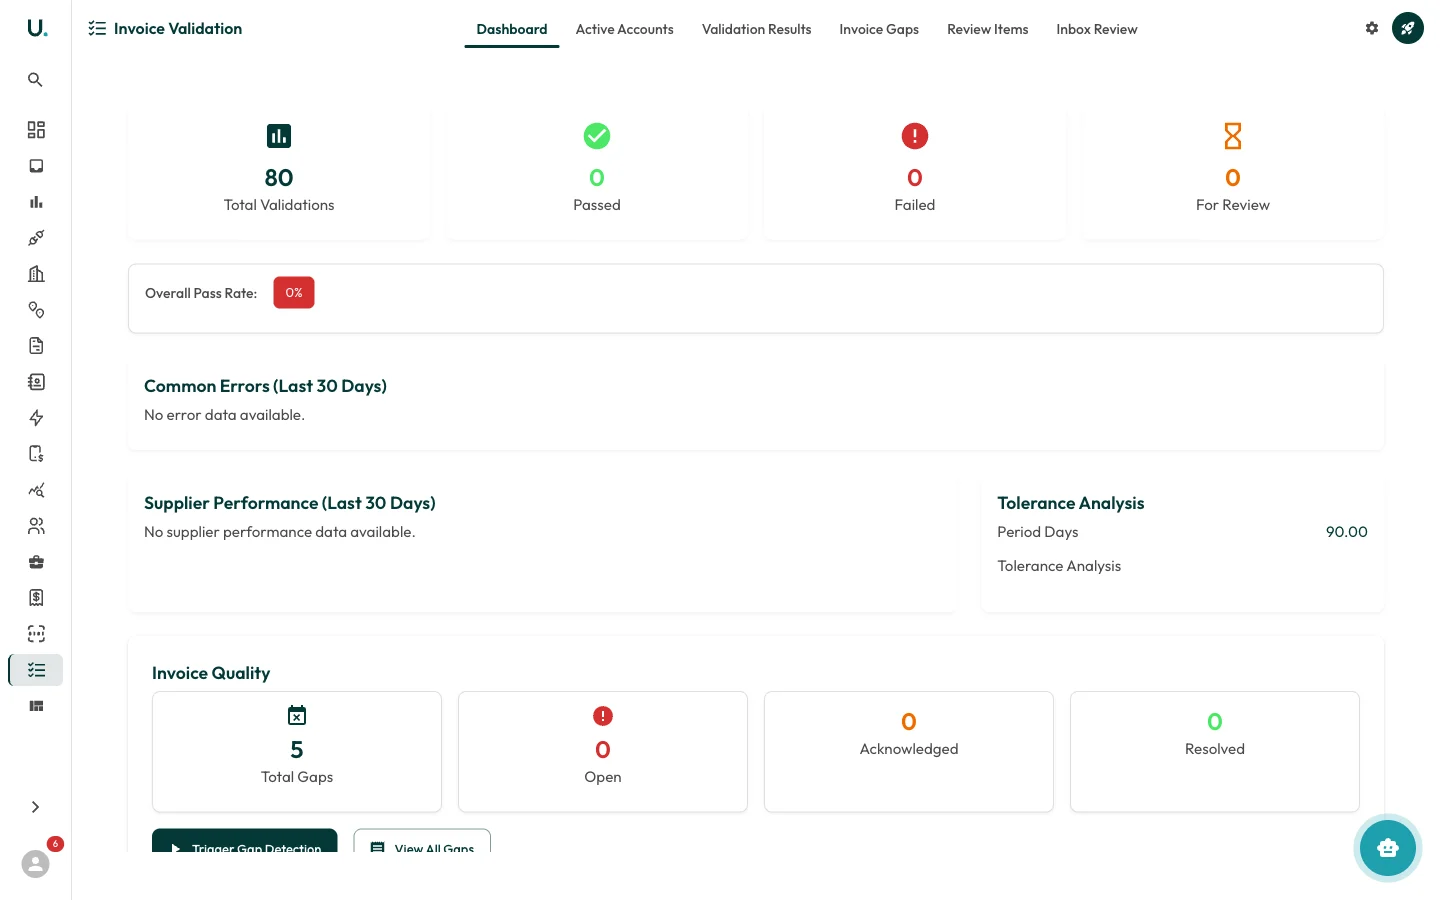
- Summary Stats — Total Validations, Passed, Failed, and For Review counts
- Overall Pass Rate — Percentage of invoices passing all checks
- Common Errors — Most frequent validation failures (last 30 days)
- Supplier Performance — How suppliers compare on validation quality
- Invoice Quality — Gap detection results (Total Gaps, Open, Acknowledged, Resolved)
Running validation on an invoice
The engine runs its checks
The validation engine checks:
- Amount accuracy — Do line item totals match the invoice total?
- Date consistency — Are billing periods correct and non-overlapping?
- Connection matching — Are charges linked to valid connections?
- Rate verification — Do rates match the expected tariff?
- Duplicate detection — Is this invoice a duplicate of an existing one?
Validation results
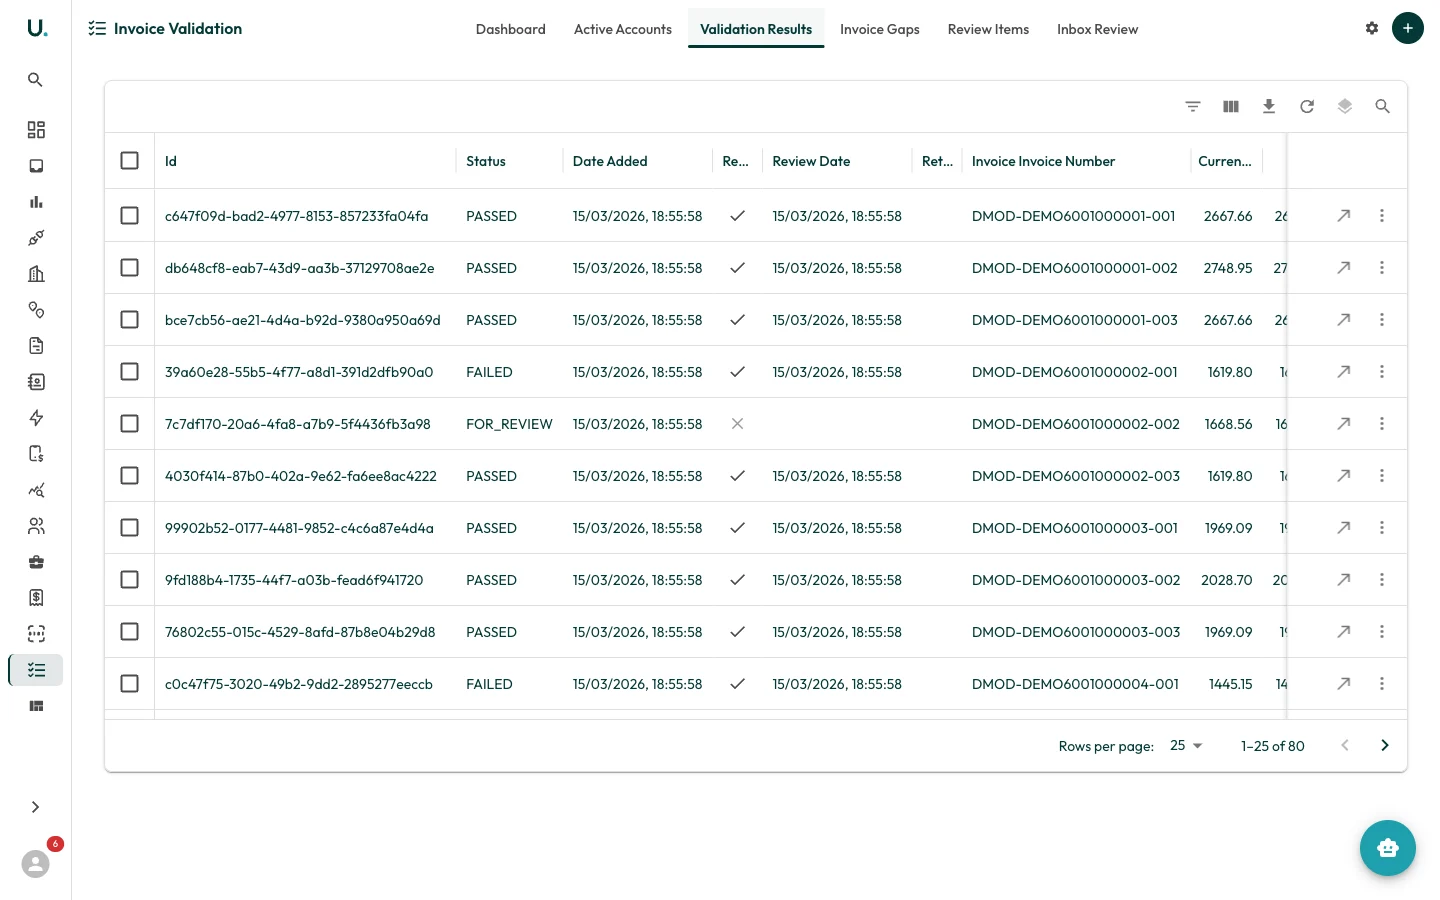
- Status — PASSED, FAILED, or FOR_REVIEW
- Current Charges and Tax amounts
- Confidence Score — System confidence in the result (0-1 scale)
- Error Source — What caused the failure (for example, TARIFF_MISMATCH, QUANTITY_CALCULATION)
Completing a review
Review the variance breakdown
Review the variance breakdown showing where charges diverge from expected tariff rates.
Review items
The Review Items tab consolidates all issues across the validation pipeline.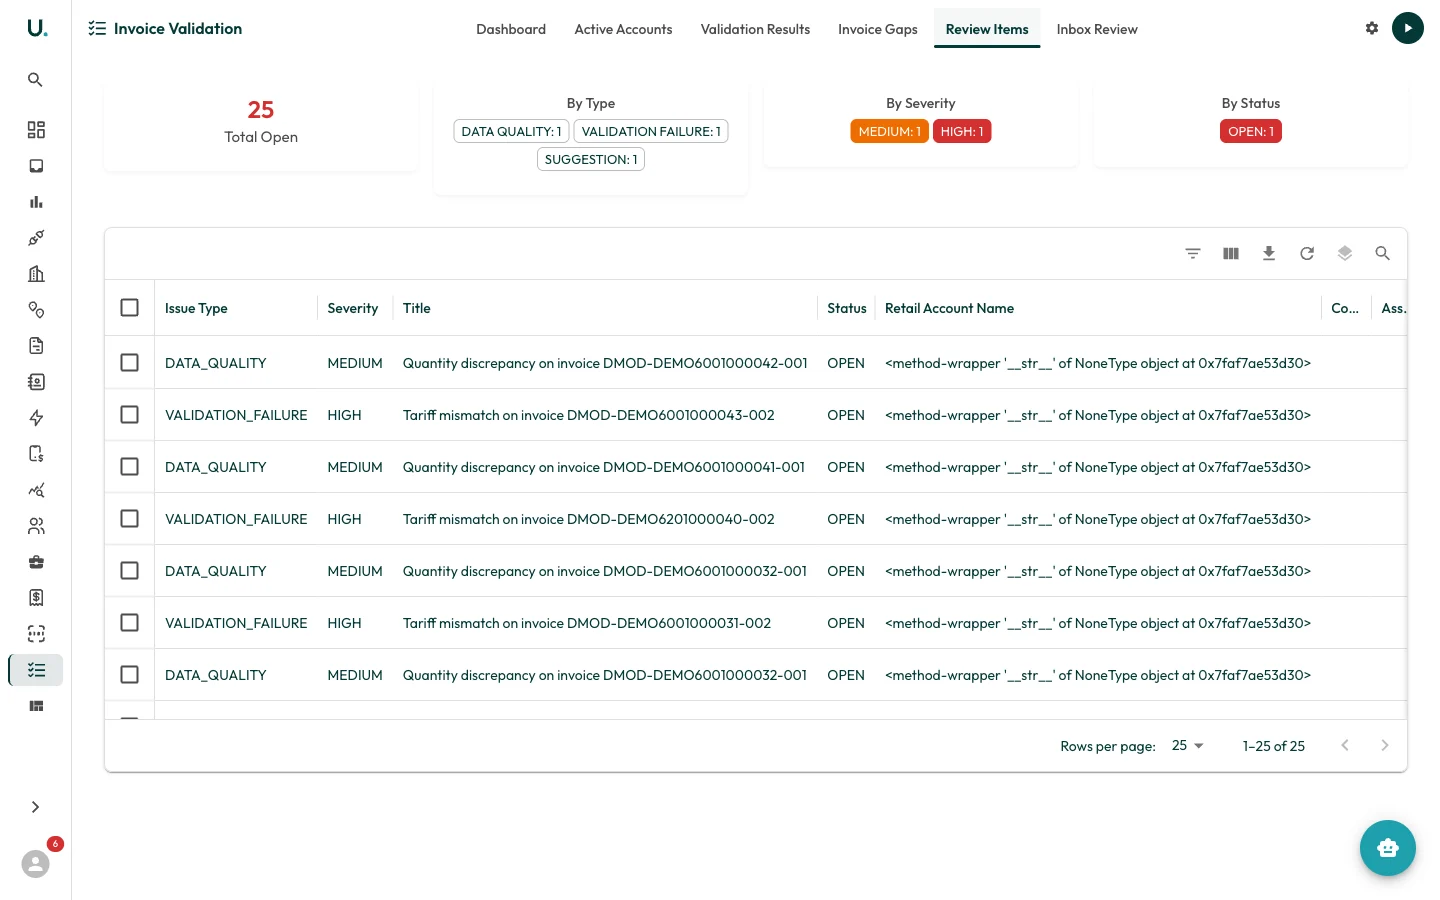
- Issue Type — VALIDATION_FAILURE, DATA_QUALITY, DUPLICATE_INVOICE, GAP, SUGGESTION
- Severity — CRITICAL, HIGH, MEDIUM, LOW, INFO
- Status — OPEN, ACKNOWLEDGED, IN_PROGRESS, RESOLVED, DISMISSED
- Title — Human-readable summary of the issue
- Variance — Dollar amount and percentage difference detected
- Recommendations — Suggested actions to resolve
Working through review items
Invoice gap detection
Invoice gaps are periods where an expected invoice is missing.
Triggering gap detection
The system analyses connections
The system analyses all connections and identifies missing billing periods.
- Open — Not yet addressed
- Acknowledged — Noted but awaiting supplier response
- Resolved — Invoice received or gap explained
Inbox review
The Inbox Review tab manages email-sourced invoices within the validation workflow.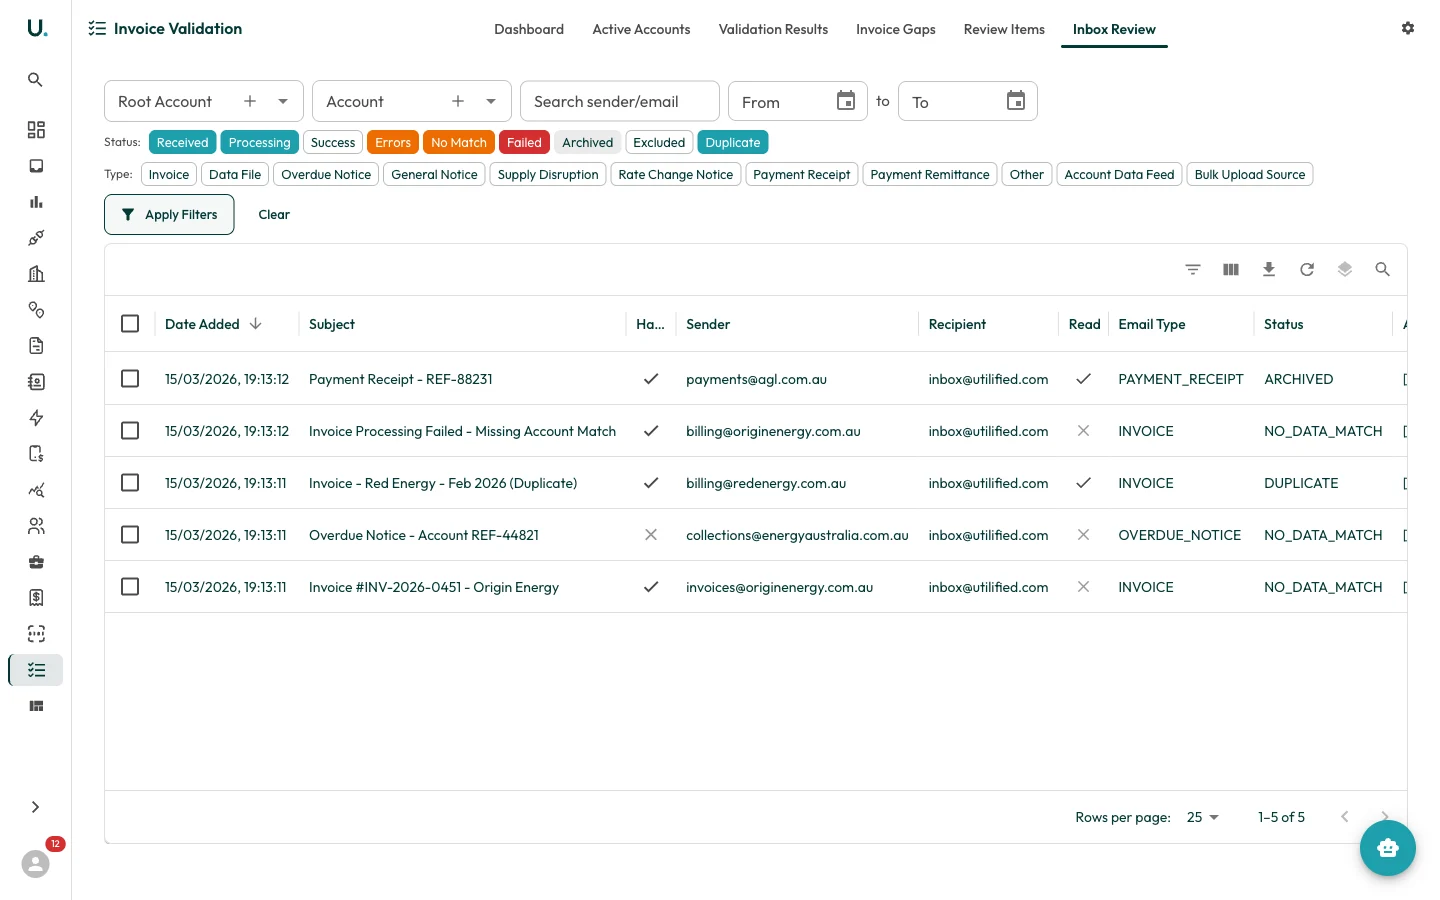
Filtering inbox items
The data grid shows inbox items with columns for Date Added, Subject, Has Attachments, Sender, Recipient, Read status, Email Type, Status, and Account Name. By default, only items matching the active status filters are shown — click Clear, then Apply Filters, to see all items regardless of status. The Inbox Review provides filtering by:- Root Account / Account — Narrow to specific accounts.
- Search — Find by sender or email subject.
- Date Range — Filter by received date.
- Status chips:
- Received — New, unprocessed emails
- Processing — Currently being processed by UtiliRead
- Success — Successfully processed into invoices
- Errors — Processed with some errors
- No Match — Could not match to an account or connection
- Failed — Processing failed completely
- Archived — Manually archived
- Excluded — Deliberately excluded from processing
- Duplicate — Detected as a duplicate
- Type chips — Invoice, Data File, Overdue Notice, Rate Change Notice, Payment Receipt, and so on.
Reviewing an inbox item
Click any row in the grid to open the detail panel on the right side.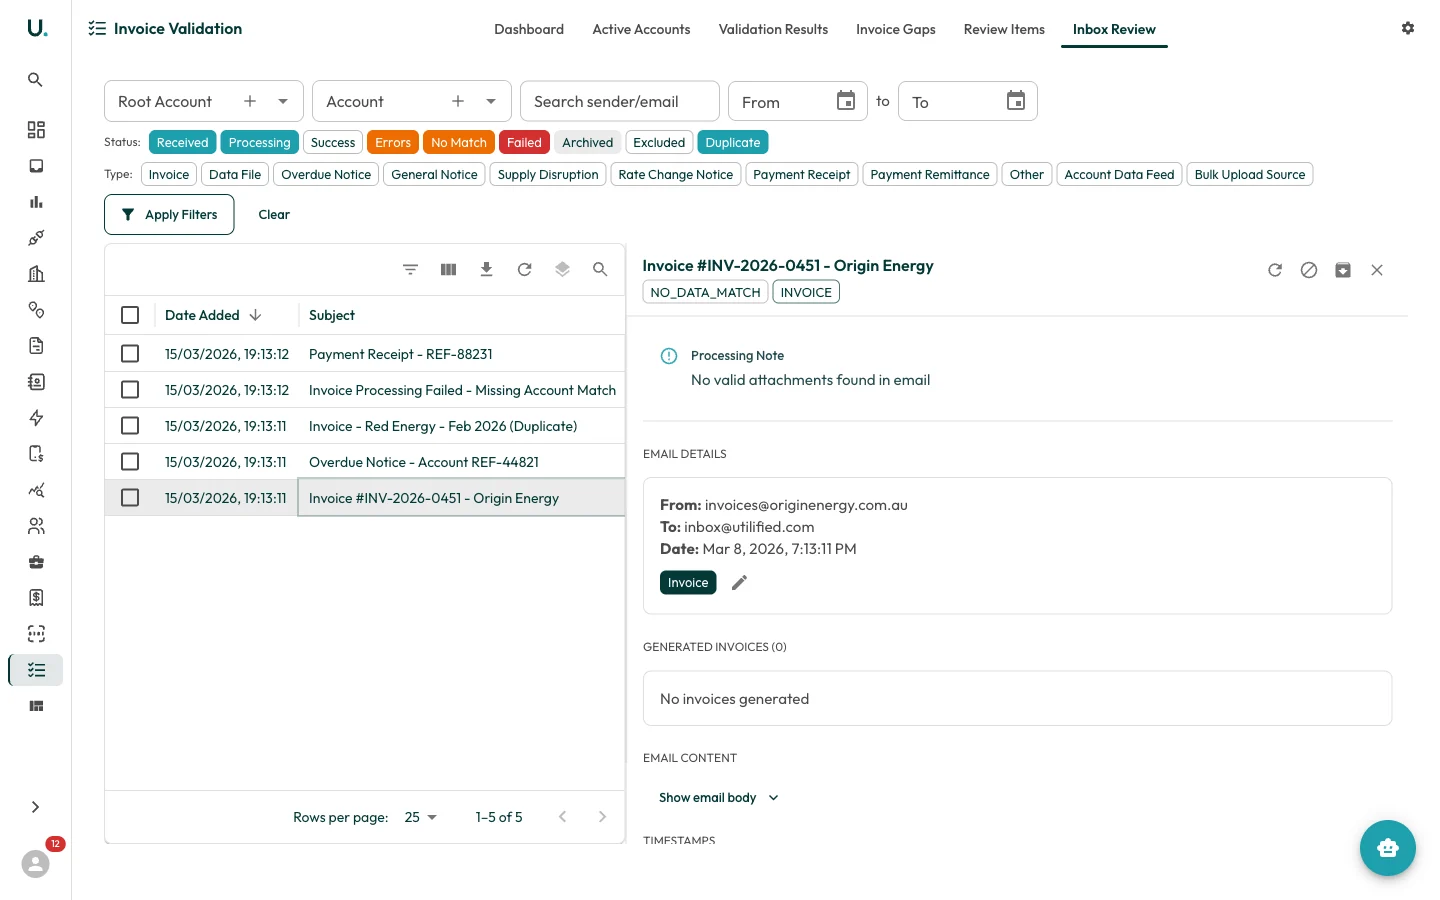
- Subject and status badges — The email subject with status (for example, NO_DATA_MATCH) and type (for example, INVOICE) badges
- Processing Note — Any notes from automated processing (for example, “No valid attachments found in email”)
- Email Details — From address, To address, received date, and email type, with an edit button to reclassify
- Generated Invoices — Any invoices created from this email. Shows count and links to the invoice detail pages
- Email Content — Expandable section to view the full email body
- Timestamps — When the email was received and processed
- Refresh — Reprocess the email.
- Exclude — Mark the item as excluded from processing.
- Process — Send to UtiliRead for OCR processing.
- Close — Close the detail panel.
Processing an inbox email
The system extracts the data
The system extracts invoice data, identifies the supplier and account, creates an invoice record, and links it to the correct connection.
Confirm the generated invoice
The Generated Invoices section updates with a link to the new invoice.
Excluding invoices
To exclude an inbox item from processing:
Use exclusion for:
- Duplicate emails that should not create new invoices
- Non-invoice communications (account notices, marketing)
- Items already processed through another channel
- Test or spam emails